

How To Upload A Movie Into Deep Dream
This tutorial contains a minimal implementation of DeepDream, as described in this web log postal service past Alexander Mordvintsev.
DeepDream is an experiment that visualizes the patterns learned past a neural network. Similar to when a kid watches clouds and tries to translate random shapes, DeepDream over-interprets and enhances the patterns it sees in an image.
It does so by forwarding an paradigm through the network, then computing the gradient of the prototype with respect to the activations of a particular layer. The paradigm is so modified to increase these activations, enhancing the patterns seen past the network, and resulting in a dream-similar image. This process was dubbed "Inceptionism" (a reference to InceptionNet, and the movie Inception).
Permit's demonstrate how y'all can brand a neural network "dream" and heighten the surreal patterns information technology sees in an image.
import tensorflow as tf import numpy as np import matplotlib equally mpl import IPython.display as display import PIL.Image Choose an image to dream-ify
For this tutorial, let'due south apply an image of a labrador.
url = 'https://storage.googleapis.com/download.tensorflow.org/example_images/YellowLabradorLooking_new.jpg' # Download an epitome and read it into a NumPy array. def download(url, max_dim=None): proper name = url.split('/')[-1] image_path = tf.keras.utils.get_file(name, origin=url) img = PIL.Image.open(image_path) if max_dim: img.thumbnail((max_dim, max_dim)) return np.array(img) # Normalize an epitome def deprocess(img): img = 255*(img + ane.0)/2.0 return tf.bandage(img, tf.uint8) # Display an epitome def show(img): display.display(PIL.Paradigm.fromarray(np.array(img))) # Downsizing the image makes it easier to work with. original_img = download(url, max_dim=500) show(original_img) display.brandish(display.HTML('Image cc-past: <a "href=https://commons.wikimedia.org/wiki/File:Felis_catus-cat_on_snow.jpg">Von.grzanka</a>')) 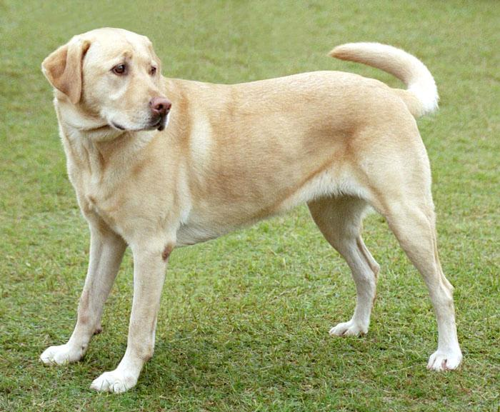
Download and fix a pre-trained prototype classification model. You will apply InceptionV3 which is similar to the model originally used in DeepDream. Note that whatsoever pre-trained model will work, although you will accept to adjust the layer names beneath if you lot modify this.
base_model = tf.keras.applications.InceptionV3(include_top=False, weights='imagenet') Downloading information from https://storage.googleapis.com/tensorflow/keras-applications/inception_v3/inception_v3_weights_tf_dim_ordering_tf_kernels_notop.h5 87916544/87910968 [==============================] - 0s 0us/step 87924736/87910968 [==============================] - 0s 0us/step
The thought in DeepDream is to choose a layer (or layers) and maximize the "loss" in a way that the paradigm increasingly "excites" the layers. The complexity of the features incorporated depends on layers chosen by yous, i.eastward, lower layers produce strokes or simple patterns, while deeper layers requite sophisticated features in images, or even whole objects.
The InceptionV3 architecture is quite big (for a graph of the model architecture come across TensorFlow's research repo). For DeepDream, the layers of interest are those where the convolutions are concatenated. There are 11 of these layers in InceptionV3, named 'mixed0' though 'mixed10'. Using different layers will result in different dream-like images. Deeper layers respond to higher-level features (such as optics and faces), while earlier layers respond to simpler features (such as edges, shapes, and textures). Feel free to experiment with the layers selected beneath, but proceed in mind that deeper layers (those with a higher index) will take longer to train on since the gradient computation is deeper.
# Maximize the activations of these layers names = ['mixed3', 'mixed5'] layers = [base_model.get_layer(name).output for name in names] # Create the feature extraction model dream_model = tf.keras.Model(inputs=base_model.input, outputs=layers) Summate loss
The loss is the sum of the activations in the chosen layers. The loss is normalized at each layer and then the contribution from larger layers does not outweigh smaller layers. Normally, loss is a quantity you wish to minimize via gradient descent. In DeepDream, you volition maximize this loss via gradient ascent.
def calc_loss(img, model): # Pass forrard the prototype through the model to recall the activations. # Converts the image into a batch of size one. img_batch = tf.expand_dims(img, centrality=0) layer_activations = model(img_batch) if len(layer_activations) == 1: layer_activations = [layer_activations] losses = [] for act in layer_activations: loss = tf.math.reduce_mean(act) losses.append(loss) render tf.reduce_sum(losses) Gradient ascent
Once y'all have calculated the loss for the chosen layers, all that is left is to summate the gradients with respect to the prototype, and add together them to the original image.
Adding the gradients to the image enhances the patterns seen by the network. At each step, you will have created an image that increasingly excites the activations of certain layers in the network.
The method that does this, below, is wrapped in a tf.office for operation. Information technology uses an input_signature to ensure that the function is not retraced for different prototype sizes or steps/step_size values. See the Concrete functions guide for details.
form DeepDream(tf.Module): def __init__(self, model): self.model = model @tf.part( input_signature=( tf.TensorSpec(shape=[None,None,three], dtype=tf.float32), tf.TensorSpec(shape=[], dtype=tf.int32), tf.TensorSpec(shape=[], dtype=tf.float32),) ) def __call__(self, img, steps, step_size): print("Tracing") loss = tf.constant(0.0) for n in tf.range(steps): with tf.GradientTape() every bit tape: # This needs gradients relative to `img` # `GradientTape` only watches `tf.Variable`due south past default tape.watch(img) loss = calc_loss(img, self.model) # Calculate the slope of the loss with respect to the pixels of the input image. gradients = tape.slope(loss, img) # Normalize the gradients. gradients /= tf.math.reduce_std(gradients) + 1e-8 # In gradient ascent, the "loss" is maximized so that the input epitome increasingly "excites" the layers. # You tin update the image by straight adding the gradients (considering they're the aforementioned shape!) img = img + gradients*step_size img = tf.clip_by_value(img, -1, 1) return loss, img deepdream = DeepDream(dream_model) Principal Loop
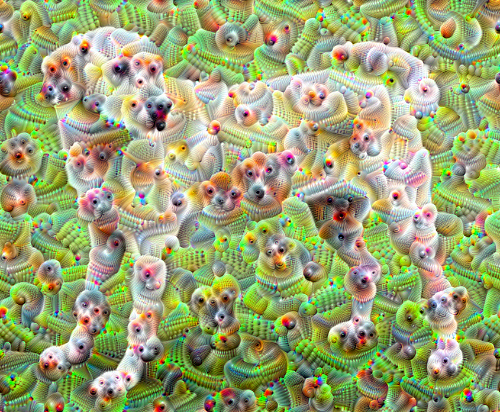
def run_deep_dream_simple(img, steps=100, step_size=0.01): # Convert from uint8 to the range expected by the model. img = tf.keras.applications.inception_v3.preprocess_input(img) img = tf.convert_to_tensor(img) step_size = tf.convert_to_tensor(step_size) steps_remaining = steps step = 0 while steps_remaining: if steps_remaining>100: run_steps = tf.abiding(100) else: run_steps = tf.abiding(steps_remaining) steps_remaining -= run_steps step += run_steps loss, img = deepdream(img, run_steps, tf.abiding(step_size)) display.clear_output(wait=True) evidence(deprocess(img)) print ("Step {}, loss {}".format(step, loss)) result = deprocess(img) brandish.clear_output(wait=True) testify(upshot) return result dream_img = run_deep_dream_simple(img=original_img, steps=100, step_size=0.01) 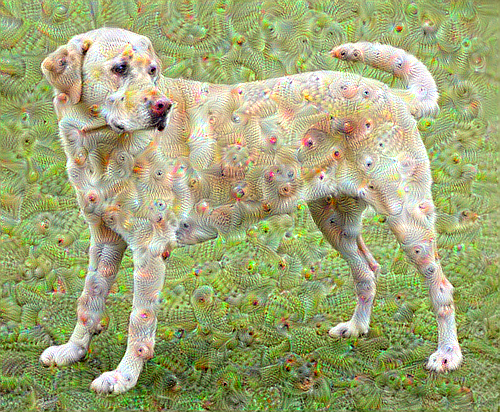
Taking it upwards an octave
Pretty good, just at that place are a few issues with this kickoff endeavor:
- The output is noisy (this could be addressed with a
tf.image.total_variationloss). - The epitome is low resolution.
- The patterns appear like they're all happening at the same granularity.
Ane arroyo that addresses all these problems is applying gradient rise at different scales. This will allow patterns generated at smaller scales to exist incorporated into patterns at college scales and filled in with boosted detail.
To do this you tin perform the previous gradient rise arroyo, then increase the size of the paradigm (which is referred to as an octave), and echo this procedure for multiple octaves.
import time start = time.time() OCTAVE_SCALE = i.30 img = tf.constant(np.array(original_img)) base_shape = tf.shape(img)[:-1] float_base_shape = tf.cast(base_shape, tf.float32) for north in range(-2, 3): new_shape = tf.cast(float_base_shape*(OCTAVE_SCALE**north), tf.int32) img = tf.image.resize(img, new_shape).numpy() img = run_deep_dream_simple(img=img, steps=fifty, step_size=0.01) brandish.clear_output(expect=Truthful) img = tf.image.resize(img, base_shape) img = tf.image.convert_image_dtype(img/255.0, dtype=tf.uint8) show(img) cease = fourth dimension.time() cease-start 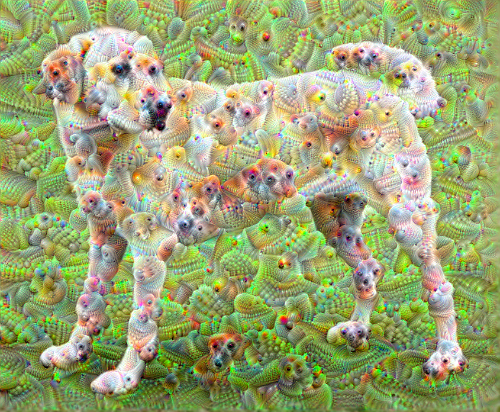
six.38355278968811
Optional: Scaling up with tiles
One affair to consider is that equally the image increases in size, then will the time and memory necessary to perform the slope calculation. The above octave implementation will not work on very large images, or many octaves.
To avert this effect you can split up the epitome into tiles and compute the gradient for each tile.
Applying random shifts to the paradigm earlier each tiled computation prevents tile seams from appearing.
Starting time past implementing the random shift:
def random_roll(img, maxroll): # Randomly shift the prototype to avoid tiled boundaries. shift = tf.random.uniform(shape=[2], minval=-maxroll, maxval=maxroll, dtype=tf.int32) img_rolled = tf.roll(img, shift=shift, axis=[0,i]) render shift, img_rolled shift, img_rolled = random_roll(np.array(original_img), 512) testify(img_rolled) 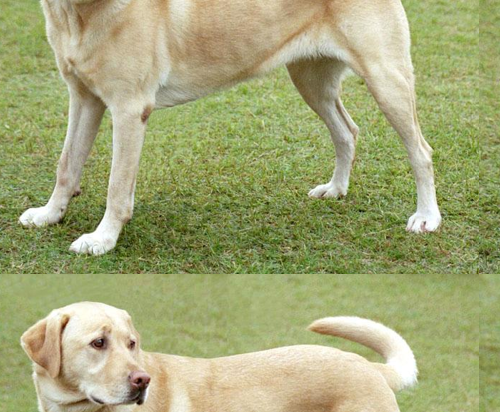
Here is a tiled equivalent of the deepdream part defined before:
form TiledGradients(tf.Module): def __init__(self, model): self.model = model @tf.function( input_signature=( tf.TensorSpec(shape=[None,None,3], dtype=tf.float32), tf.TensorSpec(shape=[two], dtype=tf.int32), tf.TensorSpec(shape=[], dtype=tf.int32),) ) def __call__(self, img, img_size, tile_size=512): shift, img_rolled = random_roll(img, tile_size) # Initialize the image gradients to zip. gradients = tf.zeros_like(img_rolled) # Skip the terminal tile, unless there'southward but one tile. xs = tf.range(0, img_size[one], tile_size)[:-1] if non tf.cast(len(xs), bool): xs = tf.constant([0]) ys = tf.range(0, img_size[0], tile_size)[:-1] if non tf.bandage(len(ys), bool): ys = tf.constant([0]) for x in xs: for y in ys: # Summate the gradients for this tile. with tf.GradientTape() as tape: # This needs gradients relative to `img_rolled`. # `GradientTape` only watches `tf.Variable`s by default. tape.watch(img_rolled) # Extract a tile out of the epitome. img_tile = img_rolled[y:y+tile_size, ten:x+tile_size] loss = calc_loss(img_tile, self.model) # Update the prototype gradients for this tile. gradients = gradients + record.gradient(loss, img_rolled) # Undo the random shift applied to the image and its gradients. gradients = tf.roll(gradients, shift=-shift, axis=[0,1]) # Normalize the gradients. gradients /= tf.math.reduce_std(gradients) + 1e-8 return gradients get_tiled_gradients = TiledGradients(dream_model) Putting this together gives a scalable, octave-aware deepdream implementation:
def run_deep_dream_with_octaves(img, steps_per_octave=100, step_size=0.01, octaves=range(-2,3), octave_scale=1.3): base_shape = tf.shape(img) img = tf.keras.utils.img_to_array(img) img = tf.keras.applications.inception_v3.preprocess_input(img) initial_shape = img.shape[:-1] img = tf.image.resize(img, initial_shape) for octave in octaves: # Scale the image based on the octave new_size = tf.bandage(tf.convert_to_tensor(base_shape[:-1]), tf.float32)*(octave_scale**octave) new_size = tf.cast(new_size, tf.int32) img = tf.epitome.resize(img, new_size) for step in range(steps_per_octave): gradients = get_tiled_gradients(img, new_size) img = img + gradients*step_size img = tf.clip_by_value(img, -i, i) if step % 10 == 0: display.clear_output(wait=True) bear witness(deprocess(img)) print ("Octave {}, Step {}".format(octave, step)) result = deprocess(img) render result img = run_deep_dream_with_octaves(img=original_img, step_size=0.01) brandish.clear_output(await=True) img = tf.epitome.resize(img, base_shape) img = tf.prototype.convert_image_dtype(img/255.0, dtype=tf.uint8) show(img) 
Much meliorate! Play around with the number of octaves, octave scale, and activated layers to alter how your DeepDream-ed image looks.
Readers might also be interested in TensorFlow Lucid which expands on ideas introduced in this tutorial to visualize and interpret neural networks.
Source: https://www.tensorflow.org/tutorials/generative/deepdream
Posted by: hessandfular.blogspot.com
0 Response to "How To Upload A Movie Into Deep Dream"
Post a Comment